

Step 01Choose the interface language
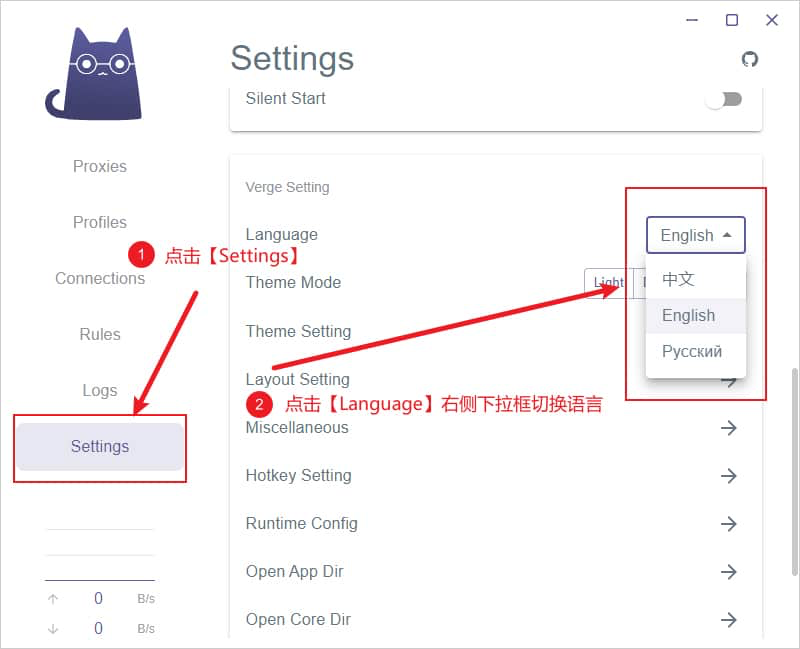
Clash Verge includes multiple interface languages. Open Settings, find Verge Setting, choose Language, click the current English value, and select Chinese or another preferred language.
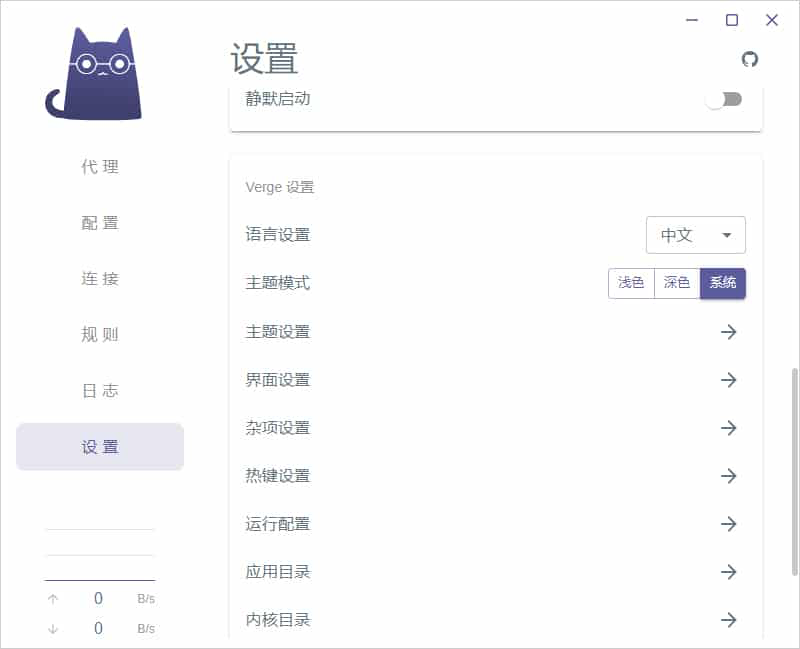
The selected language is applied immediately, as shown below.
Step 02Get a subscription
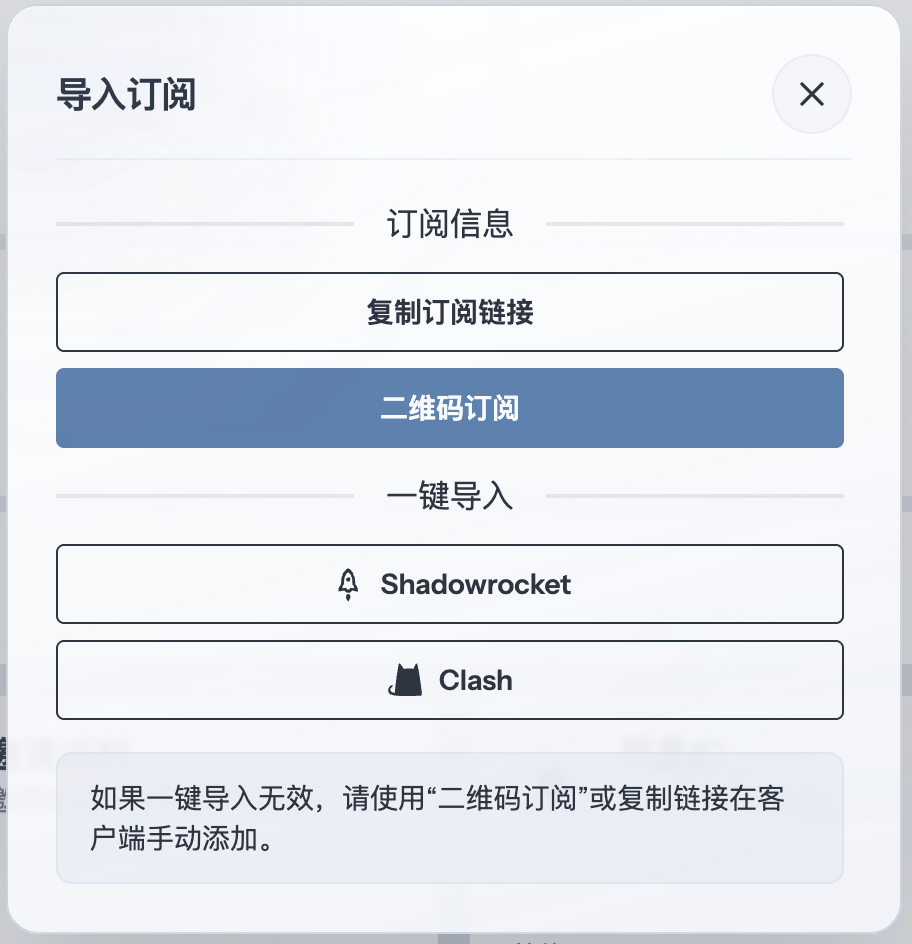
Copy a Clash/Mihomo subscription URL from your provider, then return to Clash Verge to import it. This guide uses 畅连 as an example.
Step 03Import the subscription
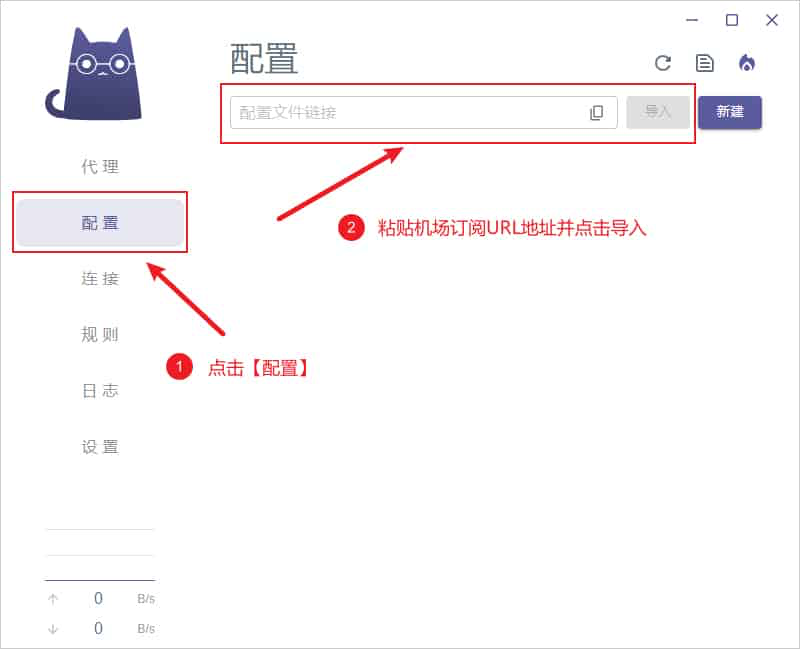
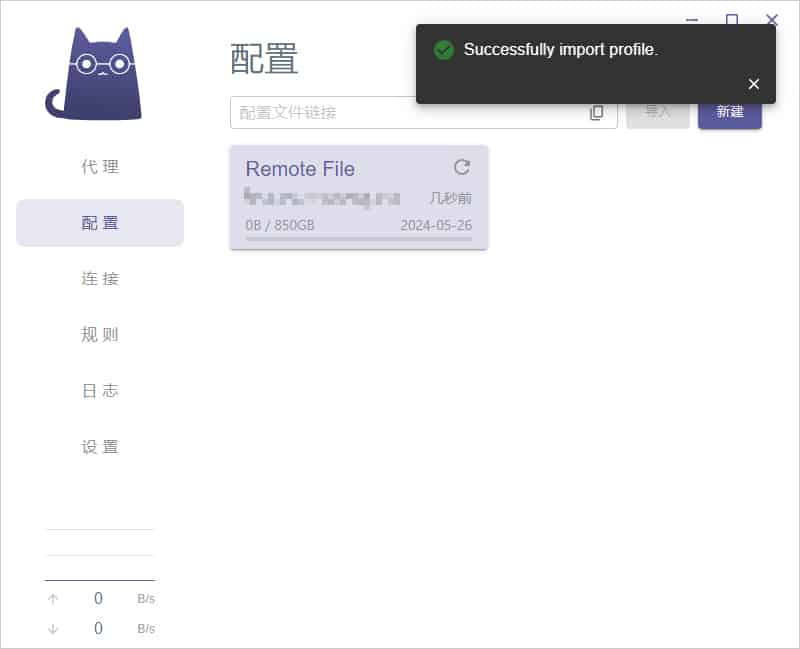
Open Profiles, paste the copied URL into the profile field, and click Import.
When Successfully import profile. appears in the upper-right corner, the subscription has been imported.
Step 04Select a node
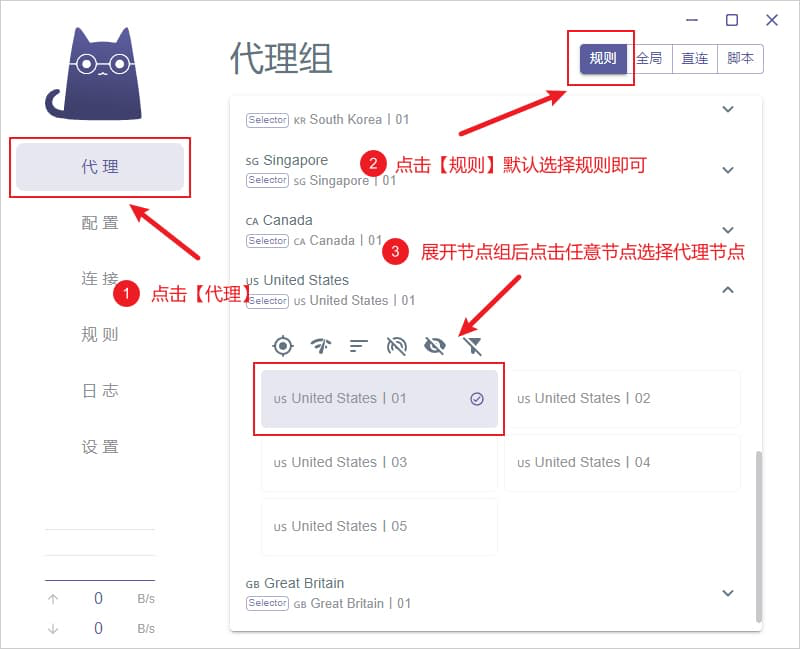
Expand the relevant policy group and click an available node to select it.
Step 05Enable the proxy
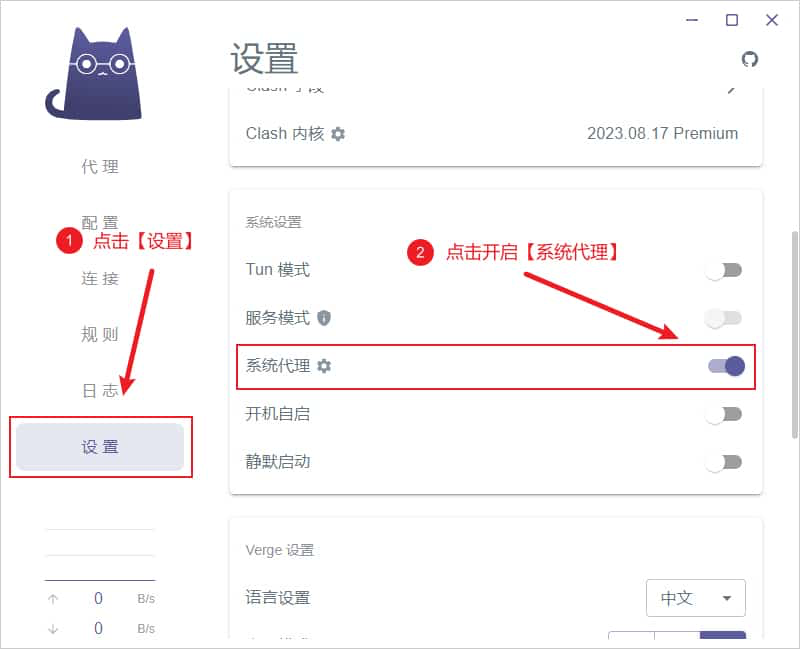
Open Settings and enable System Proxy. Once the switch turns purple, apps that respect the system proxy will send requests through Clash Verge.
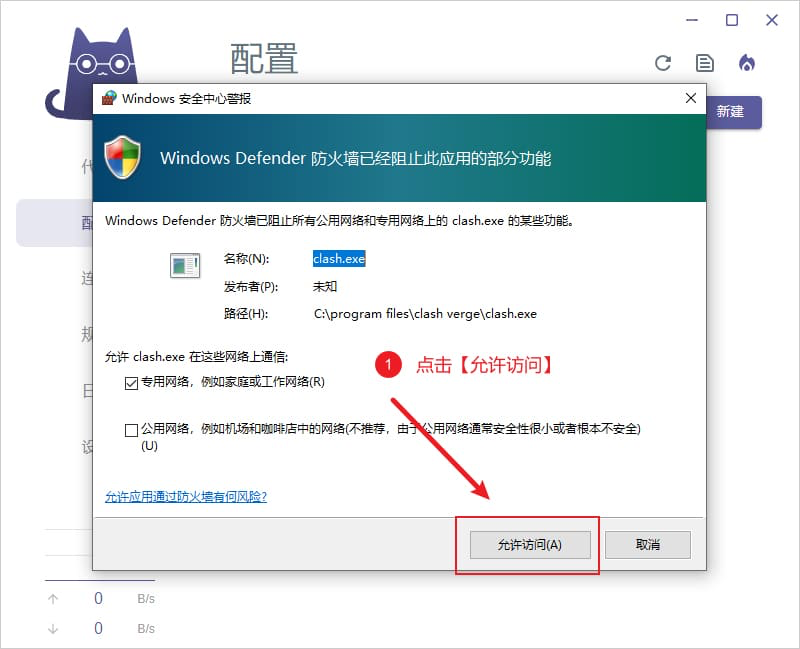
Windows may show a firewall prompt the first time the client runs. After verifying the installer source, allow access for the network types you use.
Step 06Understand proxy modes
Clash Verge provides four main proxy modes:
- Rule: routes each request according to the profile rules.
- Global: sends every request through the proxy server.
- Direct: connects every request directly without a proxy.
- Script: routes requests according to script logic.
Global mode also proxies traffic that could connect directly, which can slow local services and consume plan data. Rule mode normally preserves direct access where appropriate, so it is the better default unless you have a specific reason to use another mode.