

Step 01Get a subscription
Copy a Clash/Mihomo subscription URL from your provider, then return to ClashX Meta to import it. This guide uses 畅连 as an example.
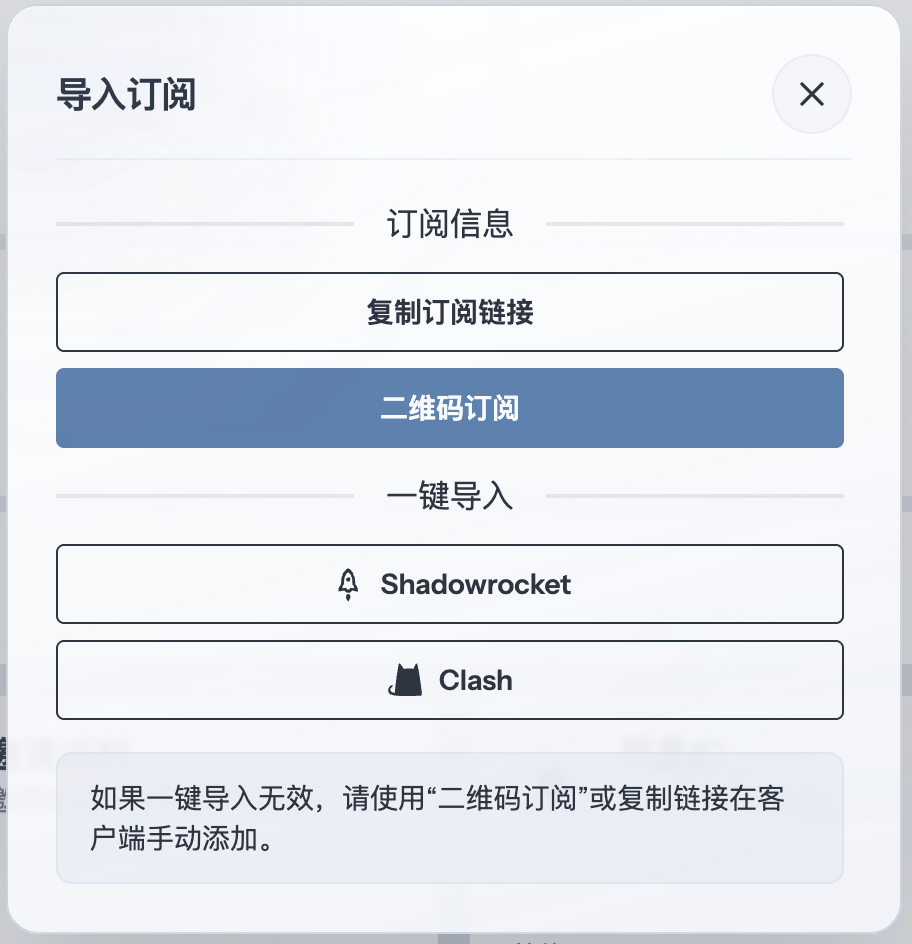
Step 02Add the subscription
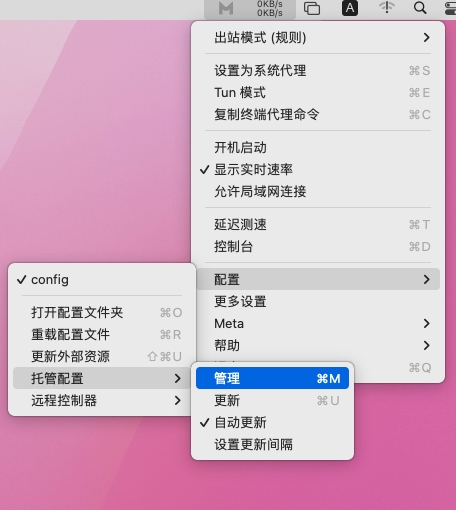
Click the ClashX Meta menu-bar icon and choose Config → Remote Config → Manage.
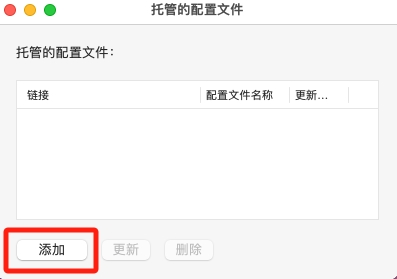
Click Add in the managed profiles window.
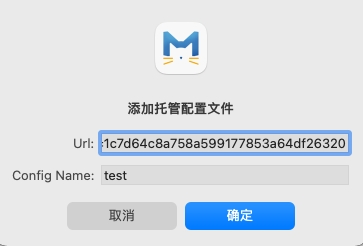
Paste the subscription URL into the URL field, enter a recognizable name in Config Name, and confirm.
Step 03Select the profile
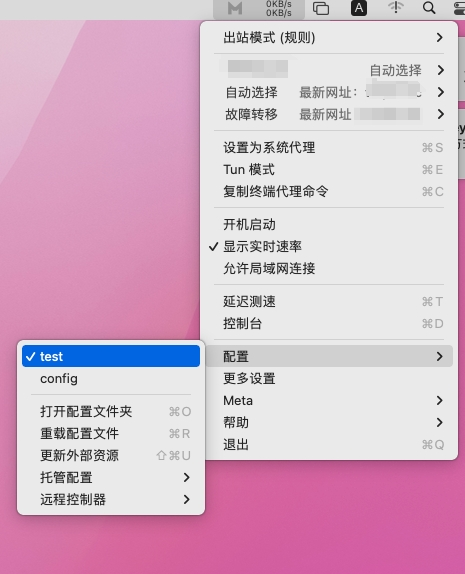
Open the ClashX Meta menu-bar menu and select the profile you just added under Config.
Step 04Select a node
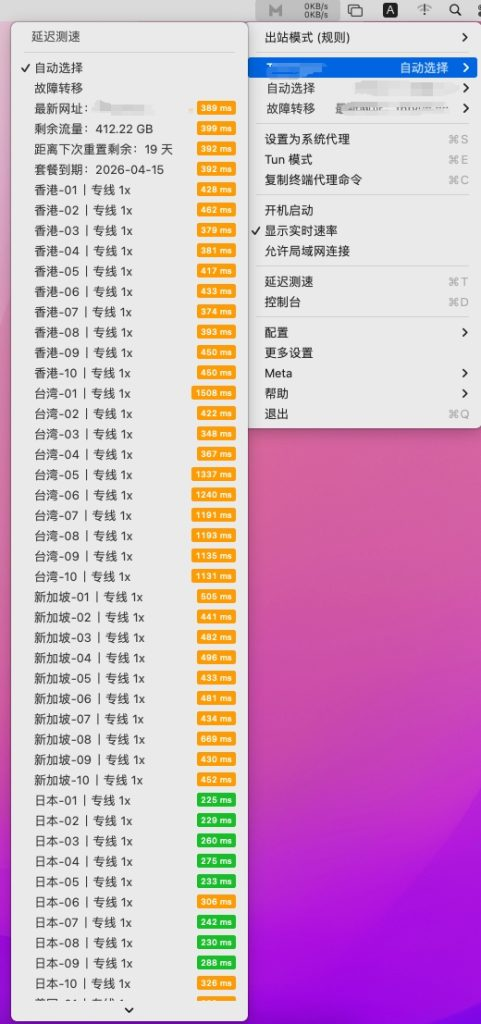
Open the proxy menu to view the available nodes and their latency, then select the node that best fits your needs.
Step 05Enable System Proxy
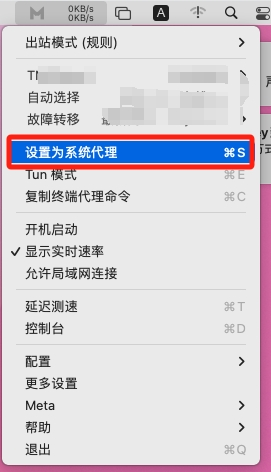
Click the ClashX Meta menu-bar icon and choose Set as System Proxy. Apps that follow the macOS system proxy will now send traffic through ClashX Meta.
Step 06Review the outbound mode
ClashX Meta provides three common outbound modes: Rule, Global, and Direct.
- Rule: follows the profile rules, sending matched requests through the proxy while handling the rest as direct or blocked traffic.
- Global: sends every request through the selected proxy node and is useful for short connection tests.
- Direct: connects every request without a proxy and is useful when comparing the local network.
Use Rule for everyday browsing. Switch to Global or Direct temporarily only when troubleshooting or when you specifically need that behavior.