
Step 01Get a subscription
Copy a Clash subscription URL from your provider, then return to ClashX to add it as a managed profile. This guide uses 畅连 as an example.
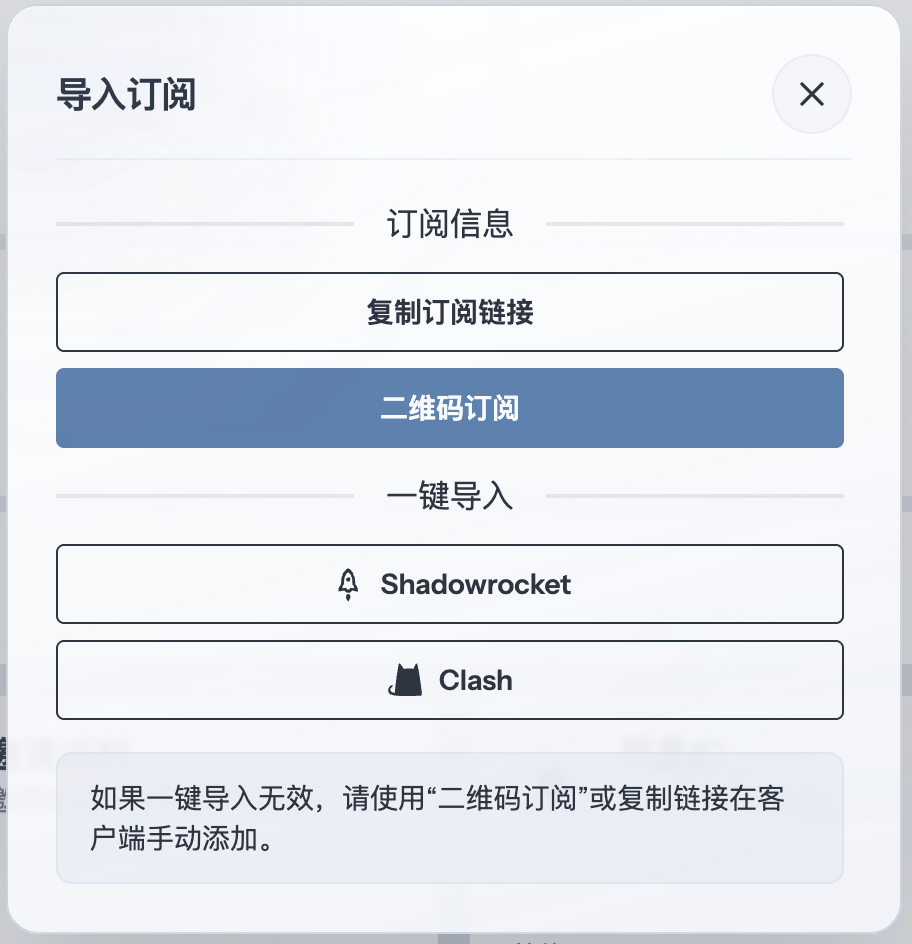
Step 02Add a profile
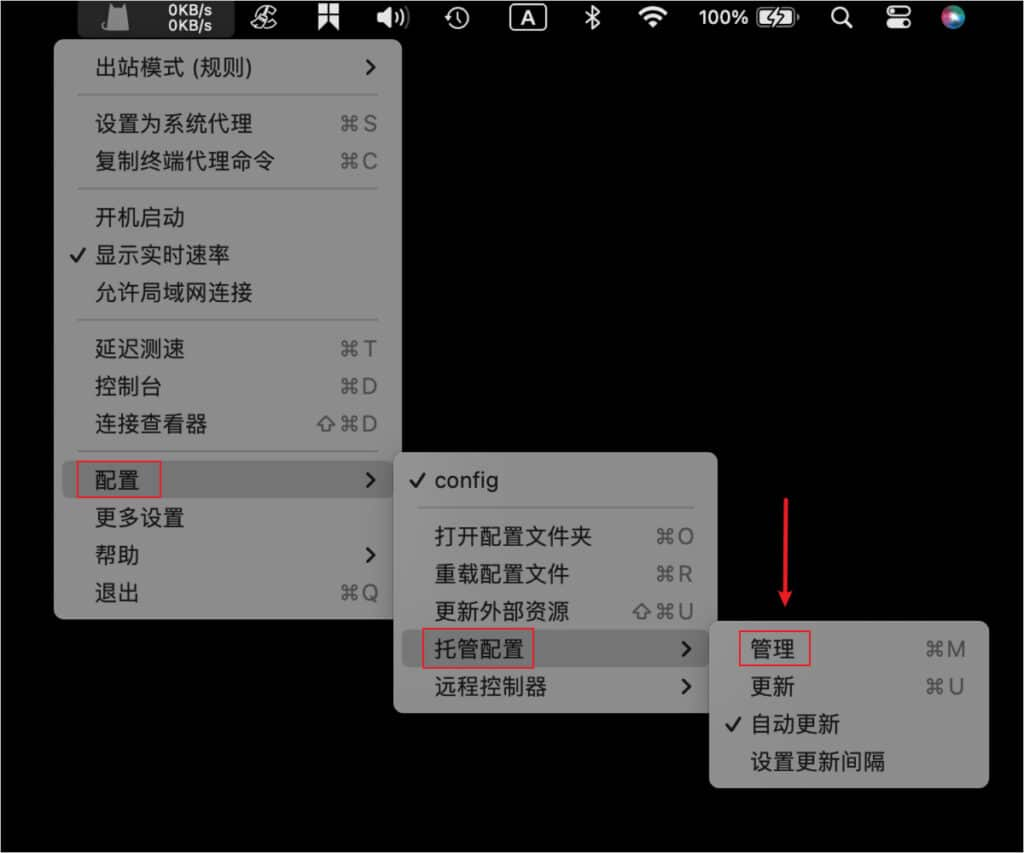
Launch ClashX, click its menu-bar icon, and choose Main Menu → Config → Remote Config → Manage.
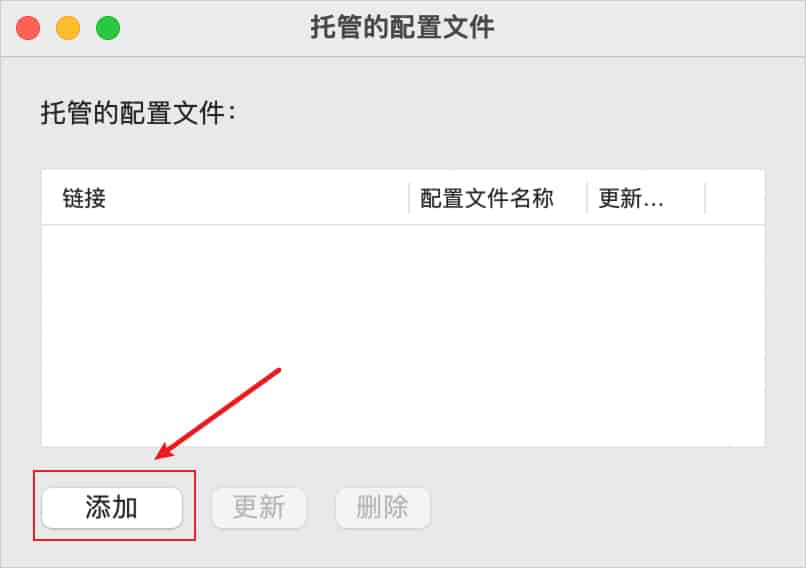
In the Managed Profiles window, click Add.
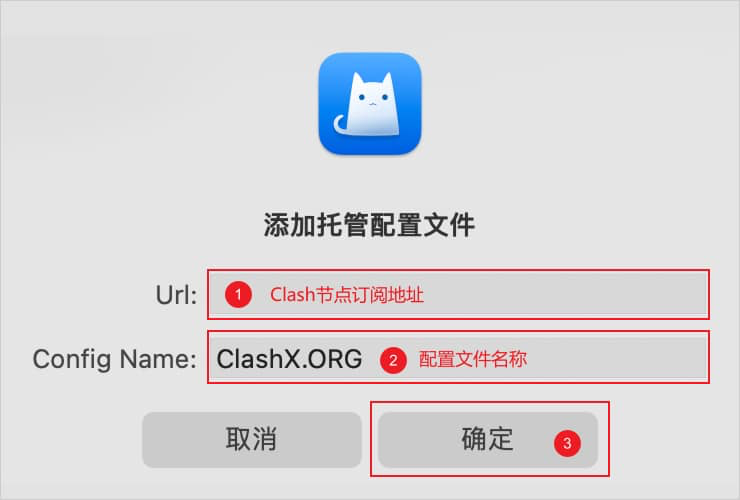
Paste the subscription URL into Url, enter a recognizable name in Config Name, and confirm.
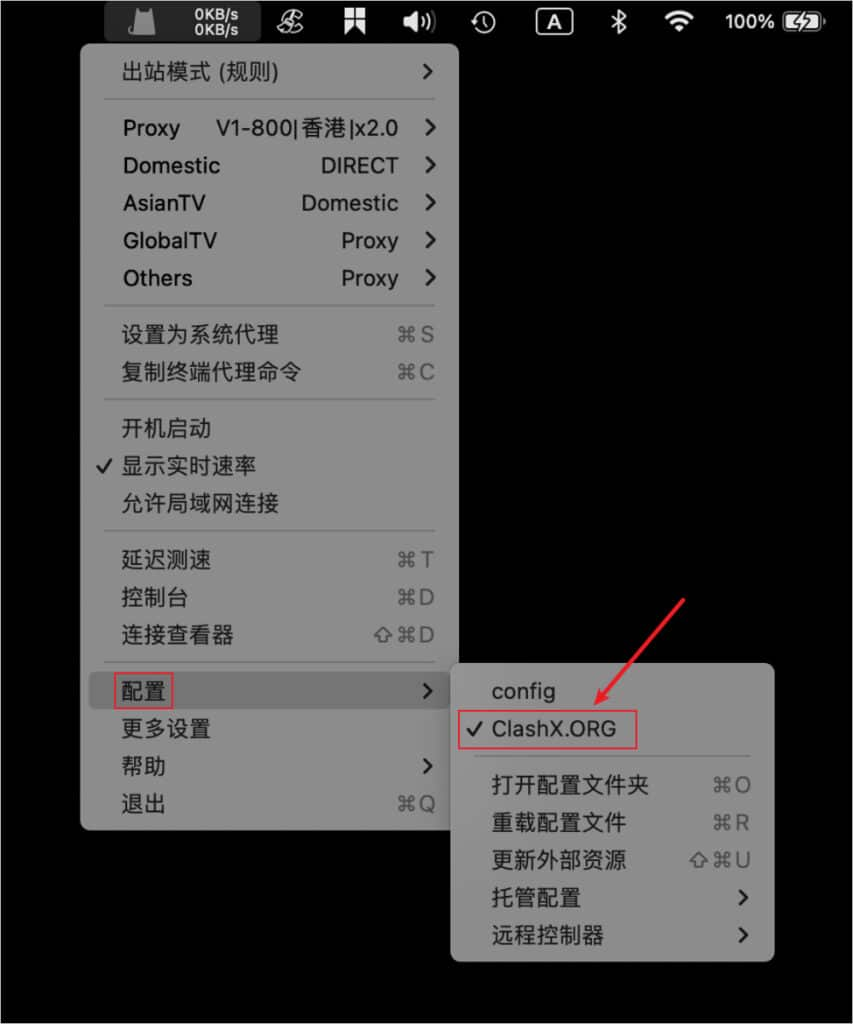
Open the menu-bar icon again, choose Main Menu → Config, and select the profile you just added.
Step 03Start the proxy
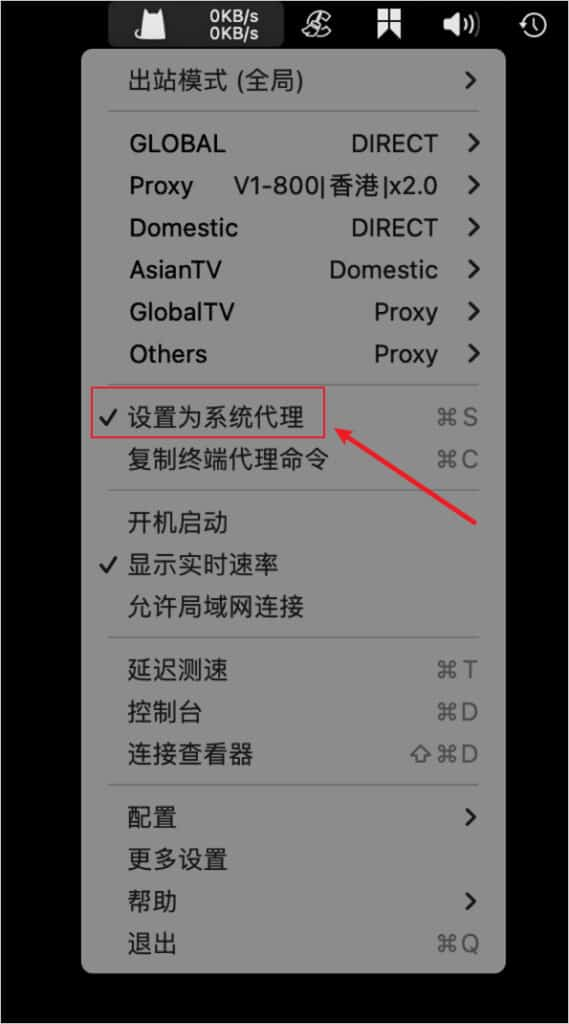
From the ClashX Main Menu, choose Set as System Proxy. Apps that follow the macOS system proxy will now send traffic through ClashX. The menu-bar cat changes color and shows live transfer rates while traffic is active.
Step 04Understand outbound modes
Open Main Menu → Outbound Mode. ClashX provides four modes:
- Global: sends every request through the proxy server.
- Rule: routes requests according to the profile rules.
- Script: routes requests according to script logic.
- Direct: connects every request directly without a proxy.
Global mode can proxy traffic that would otherwise connect directly, slowing local services and using plan data. Rule mode preserves direct access where appropriate, so it is usually the best default.